Using Synergy and Barrier on Linux, Windows, and macOS
Update 2024: The last version of Barrier (2.4.0) is available in software repositories but the Barrier website says that it is no longer maintained and no longer receives improvements and security fixes. Development efforts have now moved to the InputLeap project. As of this edit, the latest release of InputLeap is 3.0.2. See this article on instructions for installing and using InputLeap.
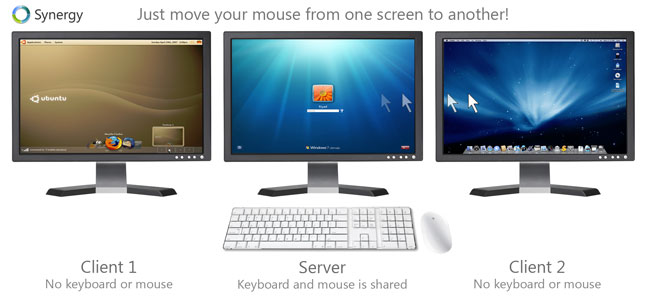
The proprietary Synergy (https://symless.com/synergy) and the free, Open Source version, Barrier (https://github.com/debauchee/barrier/releases) are magical, cross-platform applications that allow you to use the keyboard and mouse from one of your computers, to control and interact with the desktops of other computers on the same Ethernet or WiFi network. You can even copy and paste clipboard contents between them.
Our article updates Matt Cutts' 2007 blog post described "How to configure Synergy in six steps." (https://www.mattcutts.com/blog/how-to-configure-synergy-in-six-steps) It provides information and illustrates setting up the application on two Linux computers, using it's integrated graphical setup. Although our instructions show the setup for just two Linux computers, with the current releases of Barrier and Synergy 1, you can setup and control up to 14 client computers running a mix of Linux, Windows and macOS operating systems -- all from a single server computer.
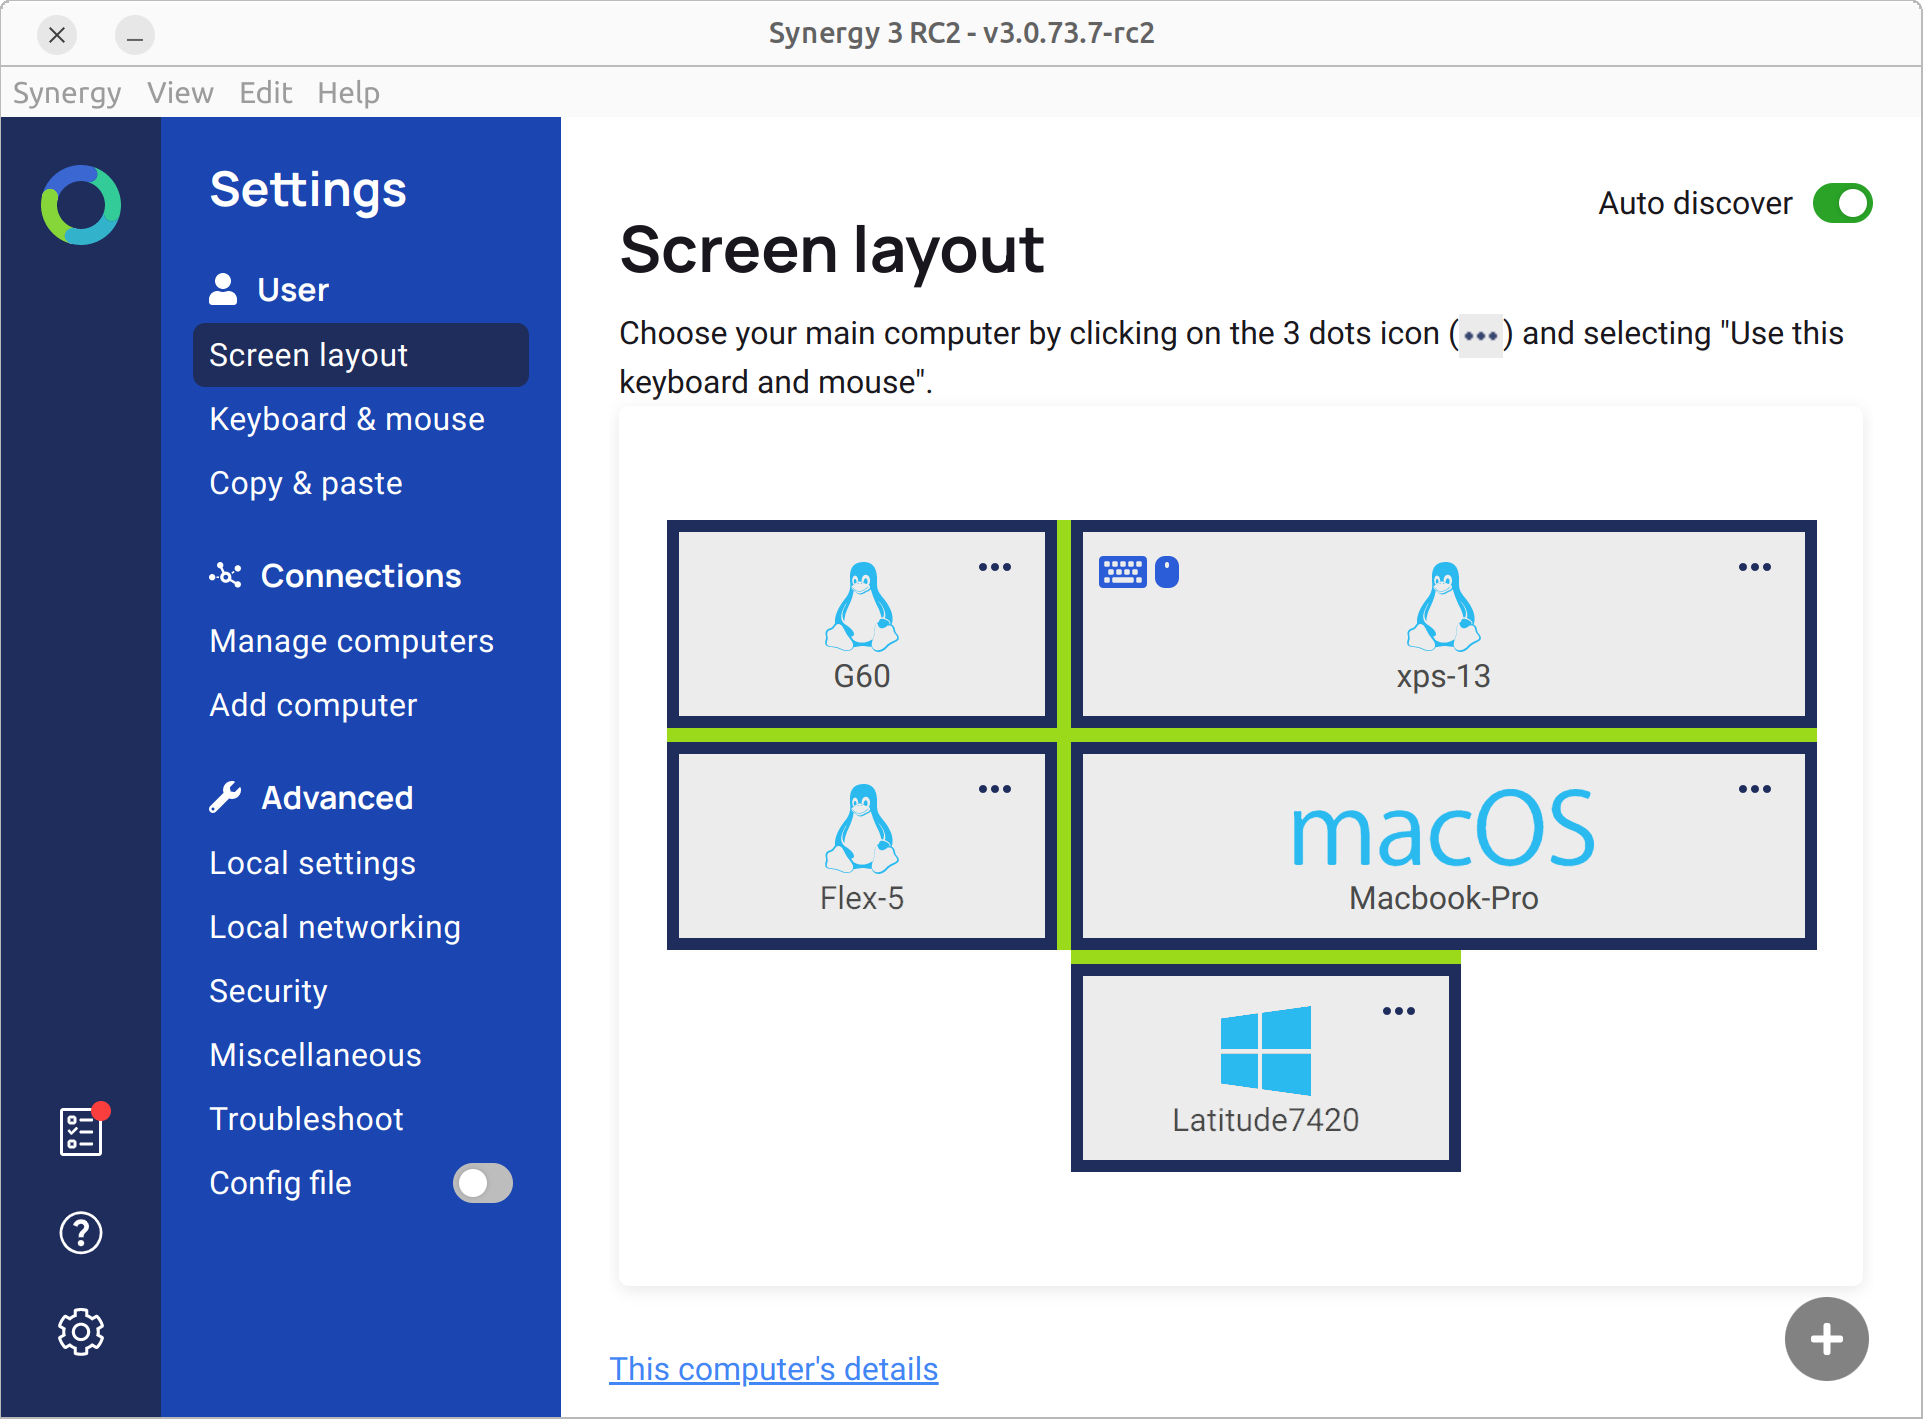
The current release for Barrier is 2.4.0 and for Synergy 1 it is 1.14.6. As you might expect for two applications with same origins, the setup is identical for both Synergy 1 and Barrier 2 so we'll show only the Barrier screens in the instructions below. The current release for Synergy is 3.0.75.7-rc3 and is designed to detect all computers with Synergy 3 install as long as they are on the same network. It also automatically establishes an initial configuration for you. You can adjust the configuration graphically to reflect your actual setup. This is my configuration. All five computers use the same keyboard and mouse connected to the XPS-13 laptop! For each of the 5 computers I have ensured that Synergy starts up automatically when the computer reboots.
Configuring Synergy 1 and Barrier 2
With the software's graphical, drag and drop setup, you can be controlling multiple Linux, Windows, and macOS computers in seconds. In our example, the keyboard and mouse are connected directly to a Dell XPS 13 running Ubuntu MATE, so we will be using them to control both this Linux computer, and an older HP G60 computer, also running Ubuntu MATE. The controlling computer is considered by Barrier to be the "server" but we don't need to worry about that terminology, since the setup doesn't require that you know that at all. Here are the steps:
Installing and starting Barrier on Linux
- To install Barrier, open your favorite Linux distribution's software repositories, package manager, software center, application library, add/remove programs, or whatever it has for getting new software. Search for "barrier." Check the version that is available. If it's earlier than 2.1.0, then you might try either the Snap package or the Flatpack package. Both are available.
- Next, determine where your computers are (or will be) located. In my case, I have my XPS 13 laptop sitting in the center of my desk. I have my G60 computer on the right side of the desk. My keyboard and mouse are in a keyboard tray between the two, and are connected directly to the Dell XPS 13. Although I also have a Windows 10 computer to the left and the monitor for a Macbook Air on the wall above the Dell, we won't consider them for purposes of these instructions. Once you have Barrier installed on all computers, the configuration steps are the same as for the HP G60 described here.
- Open the Barrier application on each computer. For most Linux distributions, Barrier is located in Applications or Menu > Accessories > Barrier.
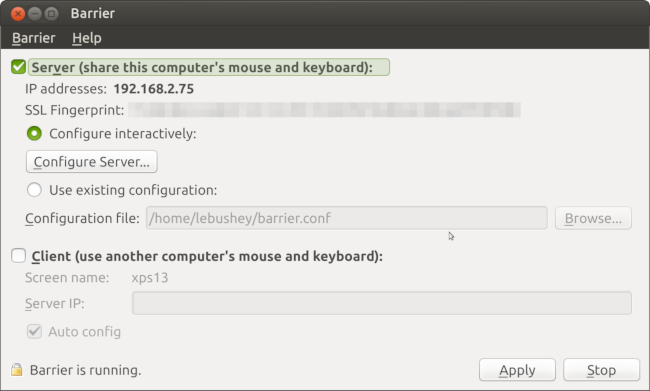
- On my Dell (the controlling computer) in the Barrier dialog box after the Welcome screen, I selected the Server check box, and click the Configure Server button.
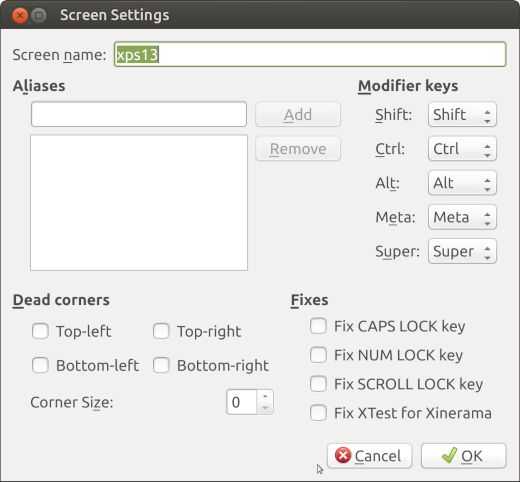
- On the configuration screen, double-click the computer in the center of the screen and enter your computer name as the Screen Name. When I installed Ubuntu MATE on my Dell, I named the computer "xps13" so that is what I entered. Click OK to save the settings.
- Drag the monitor icon from the upper right onto one of the 14 vacant squares. Since my HP G60 is on the right, I dropped the icon to the right of the XPS13's icon. I double-clicked on the "Unnamed" icon that was just created. When I installed Ubuntu MATE, I named the computer "G60-230US", so that's the name I used for it's Screen Name. Click OK to save the settings.
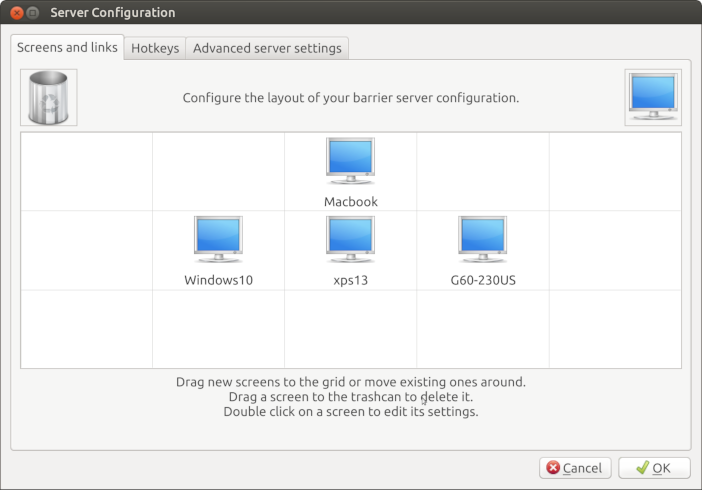
- Click OK when you have completed the setup, then click Start to start Barrier on the XPS13 computer.
- To set up the G60, we need the IP address from the XPS13 computer. To display the IP address, click the Network Manager icon in the Ubuntu MATE notification area and select Connection Information.
- Now, on the G60, in the Barrier dialog box, check the Client box and enter the IP address of the XPS13 as the Server IP:
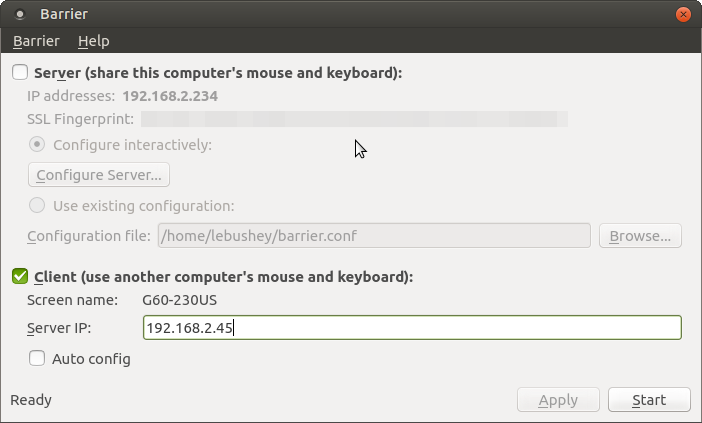
- Click the Start button, wait a second or two, and the two computers are connected. To test it, move the mouse to the right edge of the XPS13 screen and beyond. It appears on the G60 screen on the right! Now when you type on the keyboard, your text will appear on the computer where the mouse is located.
- Remember to add Barrier to the Startup Applications list for each computer.

