Create A Keyboard Shortcut To Switch Displays
Recently, a member of the Ubuntu MATE Community, samulesk, asked the question: "What keyboard shortcut do you use for Extended display in Ubuntu mate 20.04?"
I wrote this article as a way to answer in a little more detail than I did on the forum. Perhaps you'll find this article useful in personalizing your Ubuntu MATE laptops, and maybe use it as a reference for other Linux distributions.
Which Keyboard Shortcut?
I'm not aware of a "standard" key combination or shortcut to extend the screen on any Linux distribution. As an Ubuntu MATE user, I know that if you use the Displays application in the Control Center to extend the screen, your computer will remember the settings between reboots.
Ubuntu MATE's Display Settings help topic provides the details. I've found that Ubuntu MATE also remembers your settings whenever you plug and unplug the cable to your monitor or even just turn it on and off. Once you've set it, you don't really need a shortcut key unless...
If you have a laptop and you connect to different external monitors, like when you are making a presentation on a monitor or projector you may want a shortcut. First, let's look at the display settings.
Display Settings: Multiple Displays
Ubuntu MATE makes connecting multiple monitors and changing the resolution quite easy. Changing monitor preferences is accomplished by selecting Menu > Control Center > Displays in the menus.
- When you connect a second monitor, it will likely connect automatically. If it doesn't, simply click on the black rectangle that represents the second monitor and choose the On setting. When the display is switched to "On" the rectangle will be in color.
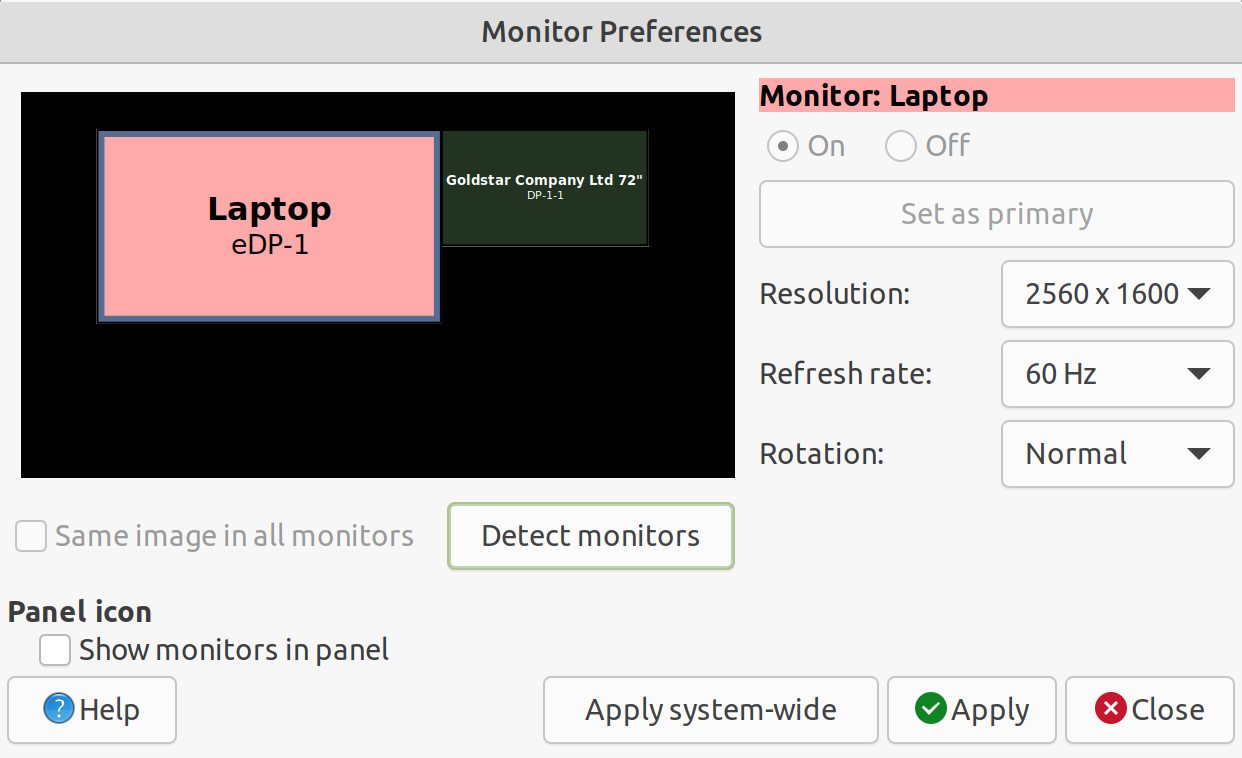
- Select the resolution settings you prefer. The list includes all of the resolutions that the monitor is capable of displaying. In this example, an HDMI cable is used to connect a 4K television as a monitor.
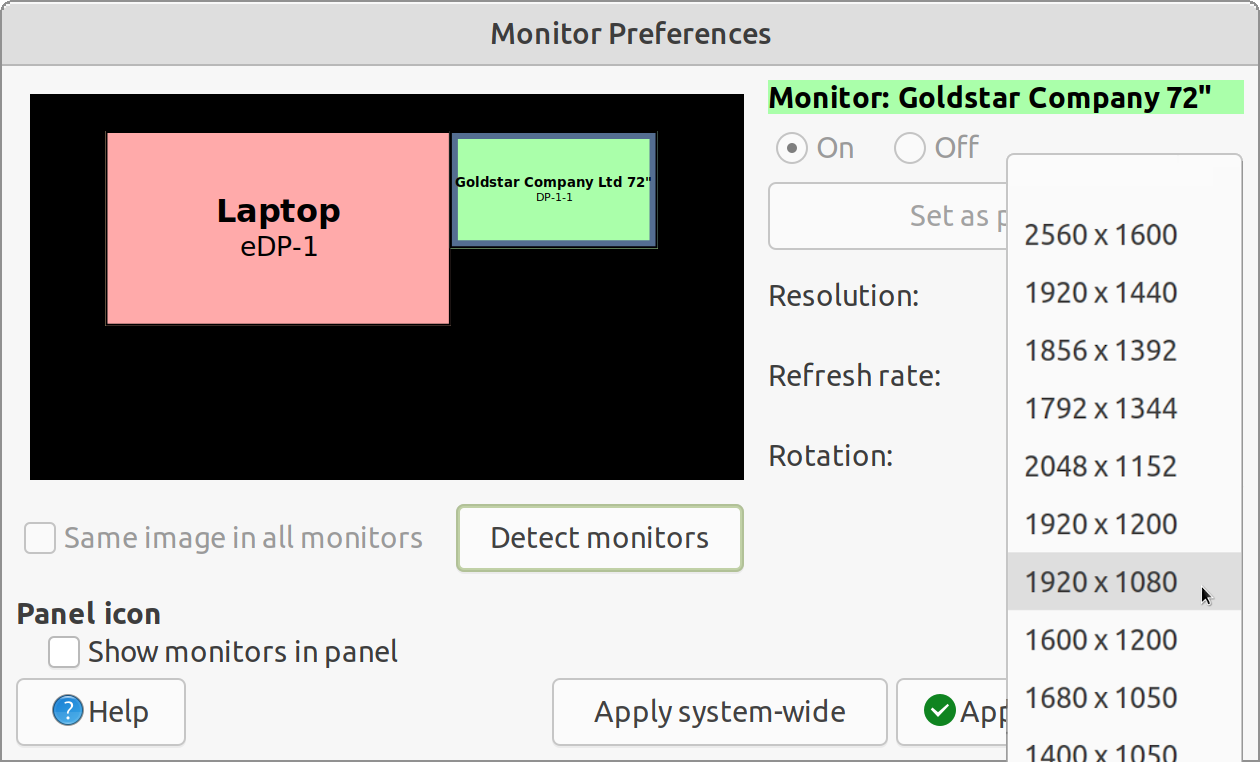
- To apply the settings, click the Apply button.
- The new configuration is set temporarily. If you don't confirm the settings, for example, if the settings don't work properly, after a short delay the configuration will revert to the previous settings.
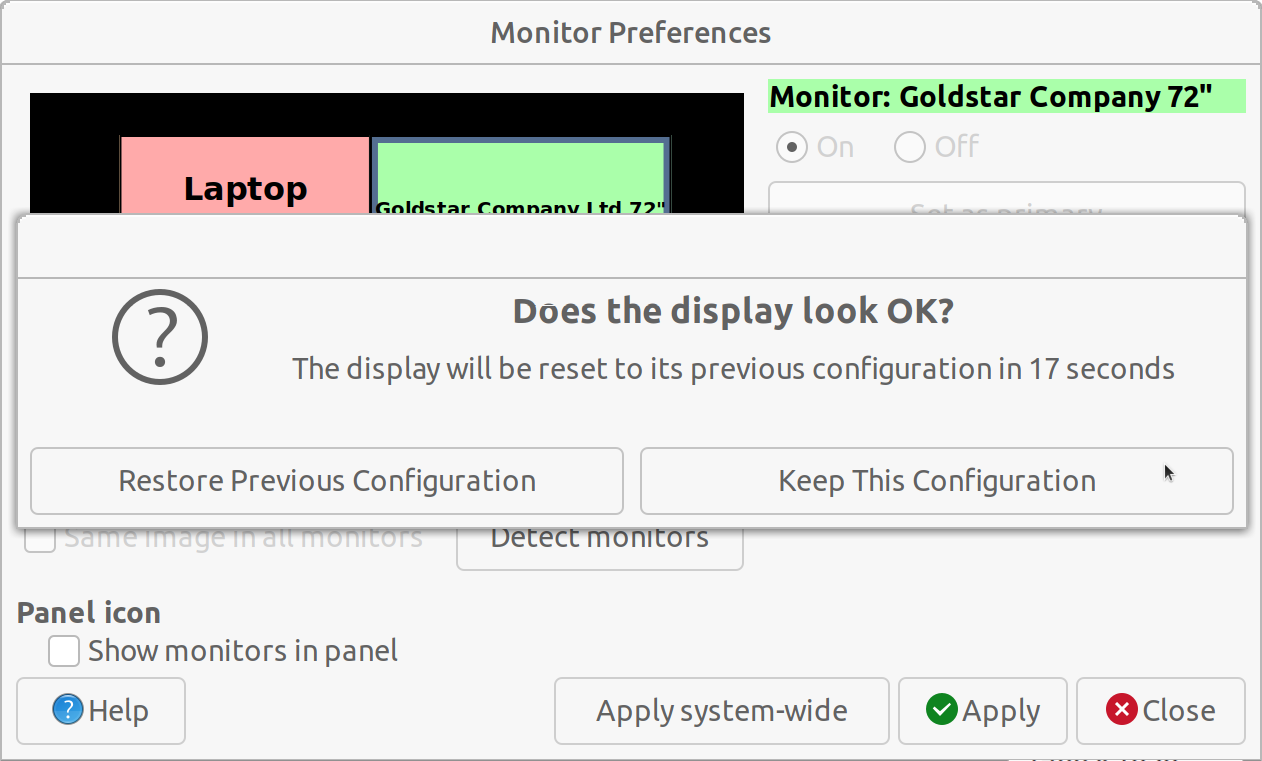
- Click on Keep This Configuration to confirm your changes.
- When you connect a second monitor, it will likely connect automatically. If it doesn't, simply click on the black rectangle that represents the second monitor and choose the On setting. When the display is switched to "On" the rectangle will be in color.
The Setup
I have several laptops, each of which comes with a key that is meant to be pressed to extend or change the screen. I have written the example script below that extends the desktop and I assigned the script to the F8 key on my XPS13. For the XPS13, that's the key that is labeled for this purpose.
I have another computer where it's the Fn+F5 key they use for this. It just depends on the computer manufacturer. In reality, once you have a script that makes the switch for you, you can use the Keyboard Shortcuts app to assign the script to any key or key combination you want.
Now let's look at how you can use the xrandr command in your script to switch the external display on and off. You will need to connect the display to your computer, then you can use a command in a terminal to determine the name, the resolution, and the position of the display that you want to include in the script.
- Open a terminal and type the command
xrandr -q | grep " connected"
The output will list your connected displays and their settings.
Writing The Script
Here's how I was able to make cycle between my laptop and an external display modes with both at 1920x1080 resolution. NOTE: The script has been created with the assumption that both the internal and external displays are capable of 1080P (1920x1024) resolution. This Ubuntu article will give you more information about setting up dual monitors.
Here is that final script. I made it executable and placed it in a folder called “bin” in my home folder and added the script to a keyboard shortcut.
#!/bin/sh# toggle-displays.sh script## Toggles between internal and external 1080P display modes## This is the version for Ubuntu MATE on the Dell XPS13 9360# eDP-1 = laptop | DP-1-1 = External Display# ########################################################### Larry Bushey#mode="$(xrandr -q|grep -A1 "DP-1-1 connected"| tail -1 |awk '{ print $1 }')"if [ -n "$mode" ]; then # External display is connected primary="$(xrandr|grep "eDP-1 connected primary")" if [ -n "$primary" ]; then # Laptop display is connected. Shut it off and make external display 1080P. xrandr --output DP-1-1 --mode 1920x1080 --primary xrandr --output eDP-1 --off notify-send --icon=/usr/share/icons/Humanity/apps/48/gnome-display-properties.svg "External 1080p" "Your external display is now set to 1920x1080 resolution." else # External display is connected # Laptop display is not connected. Set both monitors to 1080P. xrandr --output DP-1-1 --mode 1920x1080 xrandr --output eDP-1 --mode 1920x1080 # Set laptop display to the left of the external monitor and make it primary xrandr --output eDP-1 --left-of DP-1-1 xrandr --output eDP-1 --primary notify-send --icon=/usr/share/icons/Humanity/apps/48/gnome-display-properties.svg "Dual 1080P" "Your displays are now set to 1920x1080 resolution." fielse # External display is not connected. # Set laptop display to 1080P. xrandr --output eDP-1 --mode 1920x1080 --primary xrandr --output DP-1-1 --off notify-send --icon=/usr/share/icons/Humanity/apps/48/gnome-display-properties.svg "1080p" "Your laptop display is now set to 1920x1080 resolution."fi
Now it's time to test the script by running it from the terminal. Running a test from the terminal can help make sure that your script functions as expected and will display any errors if it doesn't. (If you've copied my example script, you may need to make changes to it if your monitor names or display resolutions are different from the assumptions I've made here.)
Assigning the keyboard shortcut
Finally, we assign the desired function key or key combination to the script. In this example, I chose the F8 key for my XPS13. You can choose any available key or key combination you wish.
- Open the Control Center (Menu > Control Center) and select Keyboard Shortcuts.
- Click the Add button to create a new custom keyboard shortcut.
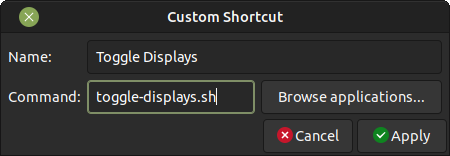
- In the Name field, type "Toggle Displays".
- In the Command field, if you placed the script in the recommended folder, simply type the name of the script, including the ".sh" extension, otherwise you will need to type the entire path.
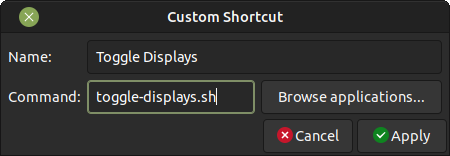
- Click the Apply button to save the settings.
- To assign a function key or other hardware key, in the list of custom shortcuts, locate the Toggle Displays shortcut and double-click on the words "New Shortcut..." and then press the key or key combination you want use to activate the shortcut.
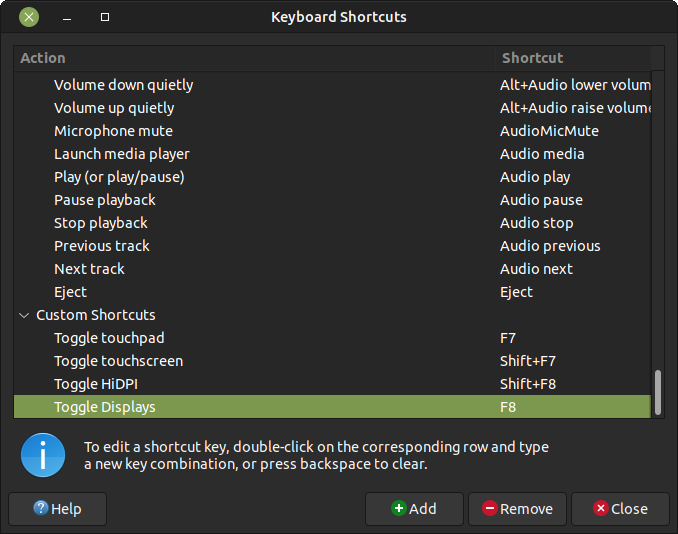
- Close Keyboard Shortcuts and try the shortcut to make sure it works.

